How do I put my business email account in my Gmail account?
Recently, I was chatting with a friend about this.
Rather than log into two separate accounts, it made sense to combine both email accounts into Google’s trusted Gmail.
So here’s my step-by-step method to import your email account into Gmail…
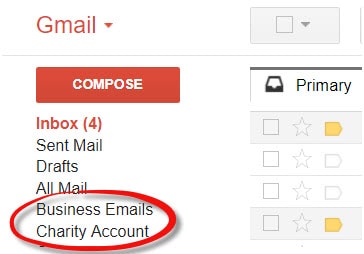
Importing Another Email Account into Gmail
First of all (after you’ve made a cup of tea, of course) open Gmail in your favourite desktop or laptop browser.
In the top right-hand corner, you’ll see a little gear-shaped icon.
Click that icon.
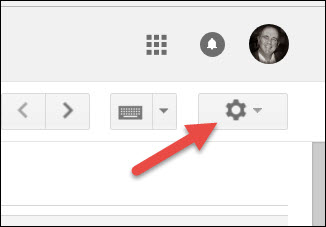
Then, from the drop-down menu, select Settings.
On the new screen which appears, select the Accounts and Import tab.

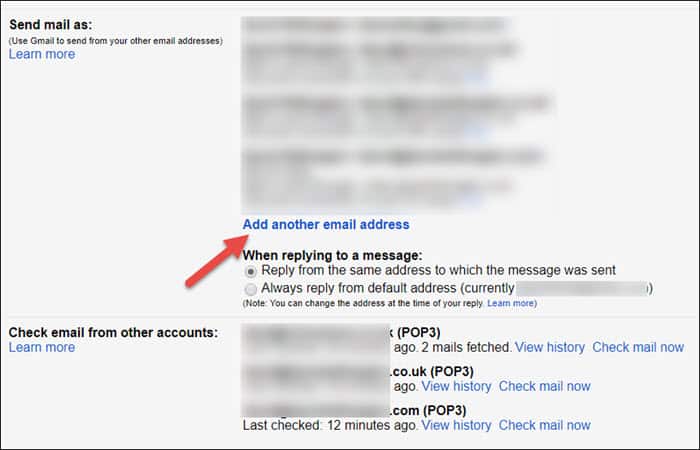
Now, just below where you see the heading, Send mail as…
Click Add another email address.
Easy, so far, eh?
Here’s what you’ll see next (we’re getting into the colourful stuff now!).
I’ve populated the boxes with some fictional details (sorry, Joe Bloggs, if you really do work at Example & Sons Ltd.).
But you’ll need to put in your own details – i.e. the details of the email account you want to import.
I always tick the Treat as an alias box.
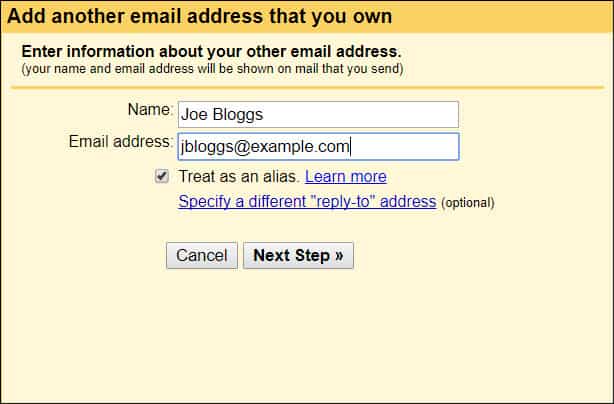
When you’re done, click Next Step.
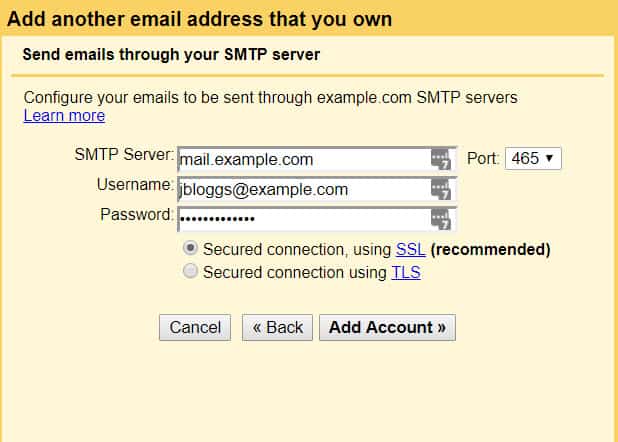
In the following box, enter a few more details.
The exact format may vary between different email accounts.
- For example: in the SMTP server box, if “mail” doesn’t work, try “smtp”.
- And if the full email address doesn’t work as a username, try just the first part (e.g. jbloggs).
- Port 465 works for my account. But it might be different for your account, so it might be best to check your account details. Either that or try them all – there aren’t that many choices!
When you’re happy, click Add Account.
Verify Your Email Account
Now at this stage, you’ll probably be asked by Google to verify your email account.
So just follow their instructions…
And then make your way back to the Accounts and Import tab (Gear icon => Settings => Accounts & Import).
Hey presto! Your new email address should be waiting for you in the list.
Setting up Incoming Mail
But wait…
What we just did was set up the outgoing mail.
Now we need to set up your incoming mail.
So just further down on that Accounts and Input page, you’ll see this…

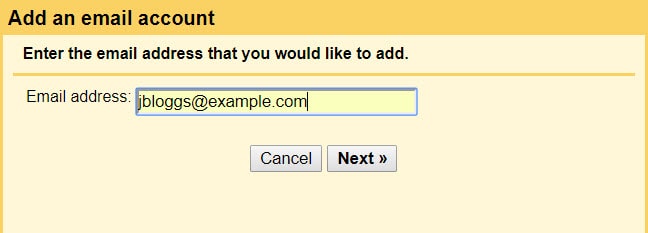
Simply click Add an email account in this section – then pop in your email address and click next.
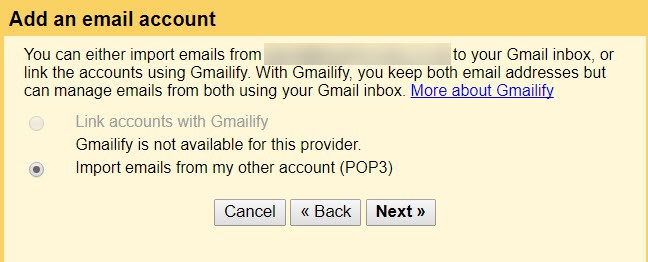
In the next box, select Import emails from my other account (POP3), and click Next.
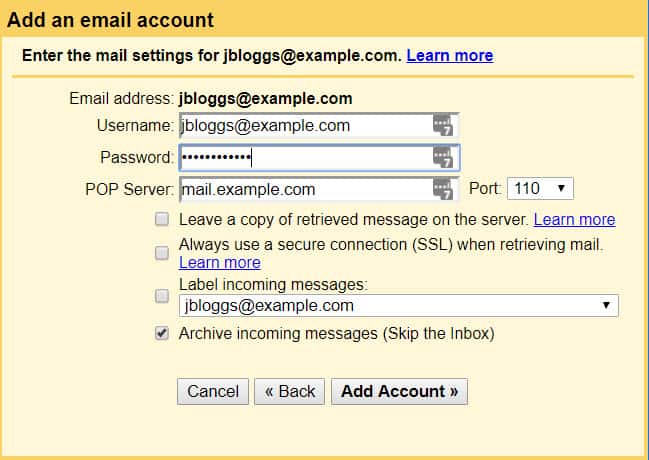
In the following box, you’ll need to add more email settings. But don’t worry, ‘cos I’ve done another example from Joe Blogg’s fictional account.
Now, just 3 of things to bear in mind…
- I’ve chosen port 110. If that doesn’t work for your email account, you’ll need to check with your email provider for the correct settings.
- I’ve also chosen to Archive incoming messages. That’s so they don’t clutter up my main inbox. Later, I’ll show you how to create a folder for all the imported emails to go directly into.
- I decided not to leave a copy of the retrieved messages on the server. After all, what’s the point of filling up the server’s email box to the point where it rejects any more incoming emails? But that’s entirely your choice; you might prefer to keep all those thousands of emails in there as a backup.
When you’ve put in all the information, click Add Account.
A Box For Your New Emails
Now let’s create a box to put all these new emails into.
So once more go into “settings” (assuming you’re not already there, of course). Reminder: click the gear icon to find it.
Then click the “Labels” tab.
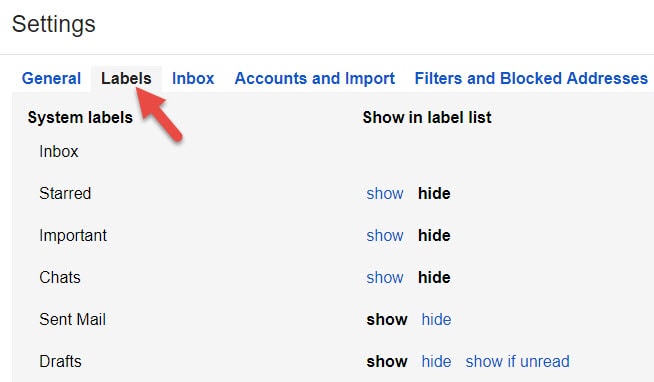
Scroll down until you see the Create new label button, and click it.
Give it a name you’ll want it to be identified by, and hit the Create button.
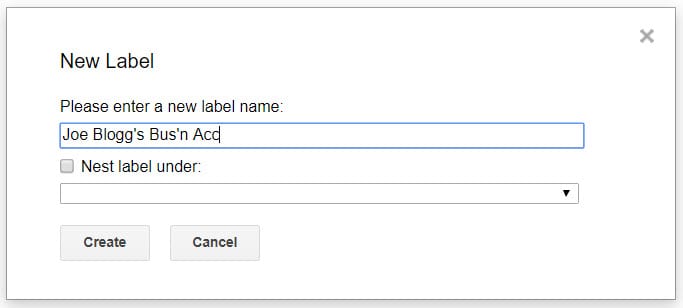
Enough for now…
Time to take a quick break for an Email Joke…
How do you know if a Yorkshire man has sent you an email?
It’ll be an E-By-Gum-Mail
OK… Let’s move on quickly!
How to Send the Right Emails into Your New Box
We’re going to add a filter so that all those emails associated with the new account will go to the right place.
So select the Filters tab again.

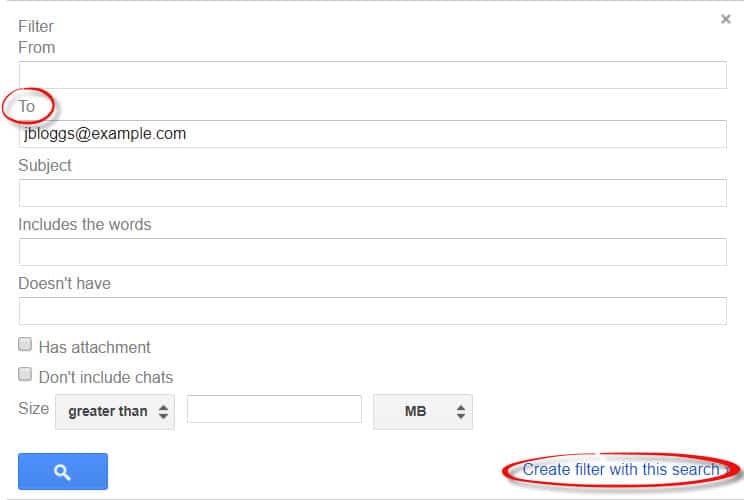
Then click on Create a new filter.

In the To box, enter the email address of the account you’re importing (make sure this is entered exactly right, or you’ll not get the emails in the box).
Then click Create filter with this search.
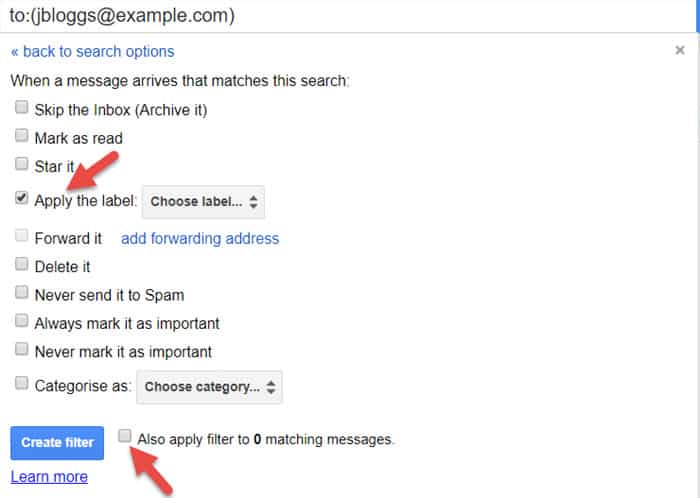
On the next screen, tick Apply the label – and from the drop-down menu, choose the label you’ve just created.
Also tick the box Also apply filter to matching messages – so it’ll pick up any messages that have already arrived.
Finally, hit the blue button “Create filter”.
And that’s it!
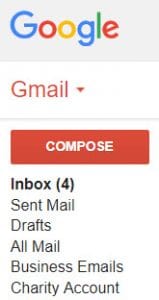
Now check your new box. You’ll see it in the column on the left of your Gmail screen.
Try sending yourself a test email from a different account and watch it arrive.
If it takes a minute or two, don’t worry. I find that happens. I think it’s to do with how frequently your external email account is polled.
An Extra Tip
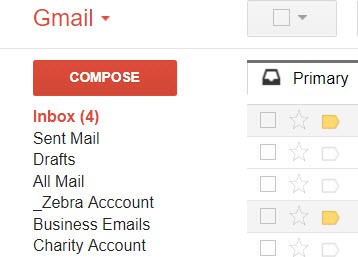
If you have a number of alphabetically-arranged folders in your Gmail account, you might find that your new folder is hidden lower in the list than you would like.
I know what that’s like ‘cos my surname begins with W – so, at school, I was always near to the end of the queue.
Plus, after all this hard work, you wouldn’t want to miss an important email.
So here’s a way you can get around that problem:
Simply add an underscore to the beginning of the folder name.
So, for example…
Joe Bloggs’s Bus’n Acc
would become…
_Joe Bloggs’s Bus’n Acc
One More Tip…
Now, when you compose your next email within Gmail, you can decide whether to send it from your Gmail account or your other account.
To do that, simply click the little arrow next to the email address in the From box, and select the account you want to send it from.

I hope you’ve found that helpful.
If you have any questions, or improvements to suggest, please pop them into the comments box – or send me a message.
I hope you get a lot of benefit from keeping life a bit simpler by keeping your email addresses together.
Disclaimer
I’m adding a disclaimer because things change over time. And your email account might not have the same settings as mine, anyway.
This method works well with my email accounts, but it might not work with yours. So if you follow the guide, please remember you do so at your own risk.
But if it works for you, it’ll change your life. Hmm… perhaps I shouldn’t say that, cos I can’t really guarantee it. OK… you’ll have a nice day. 🙂


Leave a Reply